Add Shared Printer in Settings
1. Open Settings, and click/tap on the Devices icon.
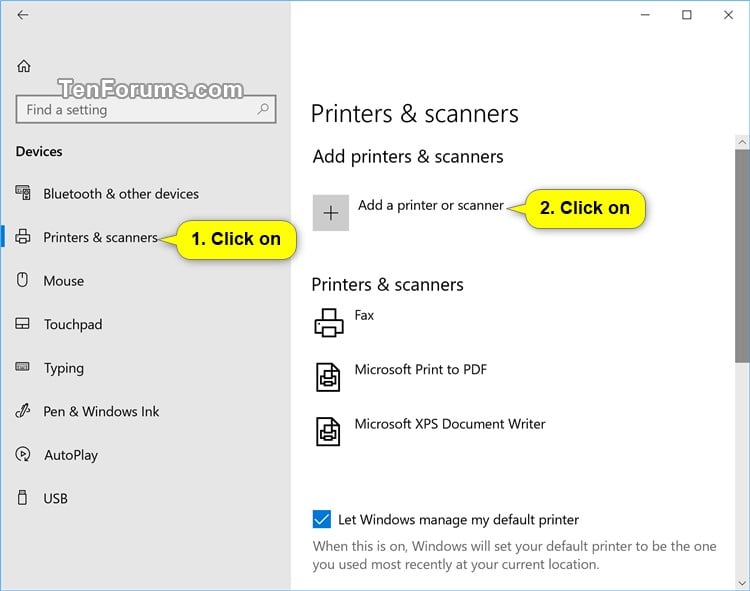
2. Click/tap on Printers & scanners on the left side, and click/tap on Add a printer or scanner on the right side. (see screenshot below)
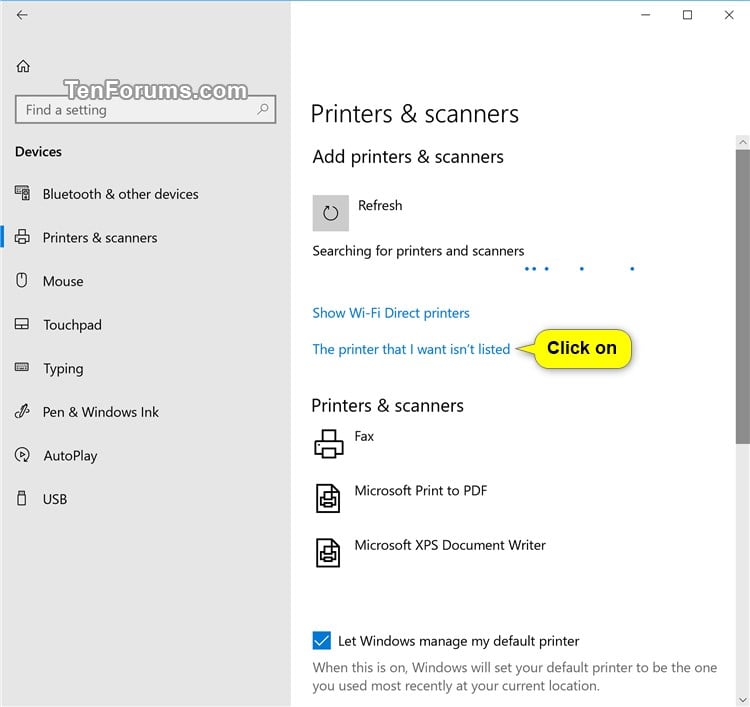
3. Click/tap on the The printer that I want isn't listed link on the right side when available. (see screenshot below). Please note the method below is if you do now see the Share printer listed. If you do see the printer, please click on it to add the printer.
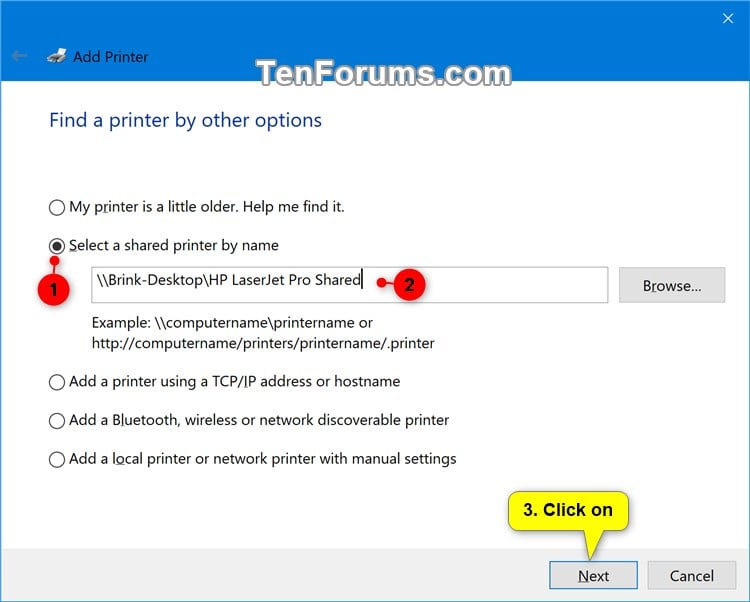
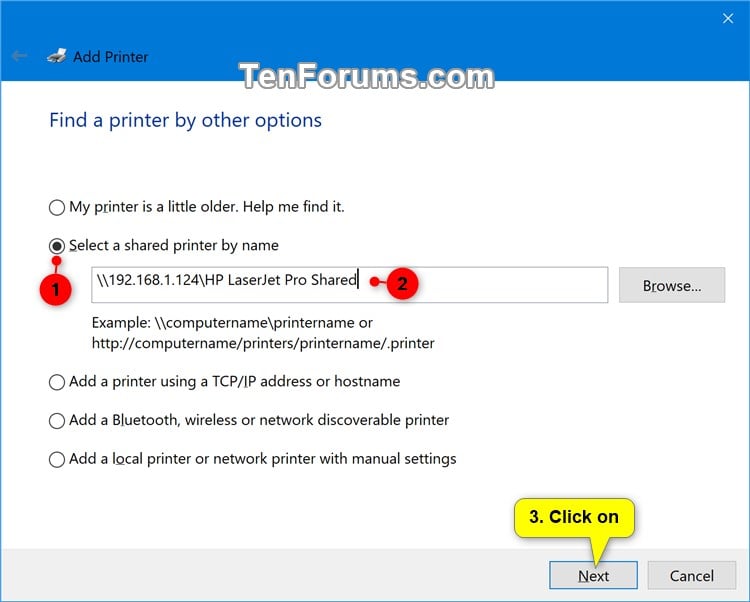
4. Select (dot) the Select a shared printer by name option, type in network path of the shared printer, and click/tap on Next. (see screenshots below)
For example:
\\Computer name\Share name of shared printer
OR
\\IP Address\Share name of shared printer
5. Your PC will now try to locate the shared printer, then download and install the driver from the computer the shared printer is connected to. (see screenshots below)
 If drivers for your 32-bit or 64-bit Windows 10 is not available from the computer the shared printer is connected to, then you will need to manually find and install the driver for the printer instead.


6. Click/tap on Next if the shared printer has been successfully added. (see screenshot below)
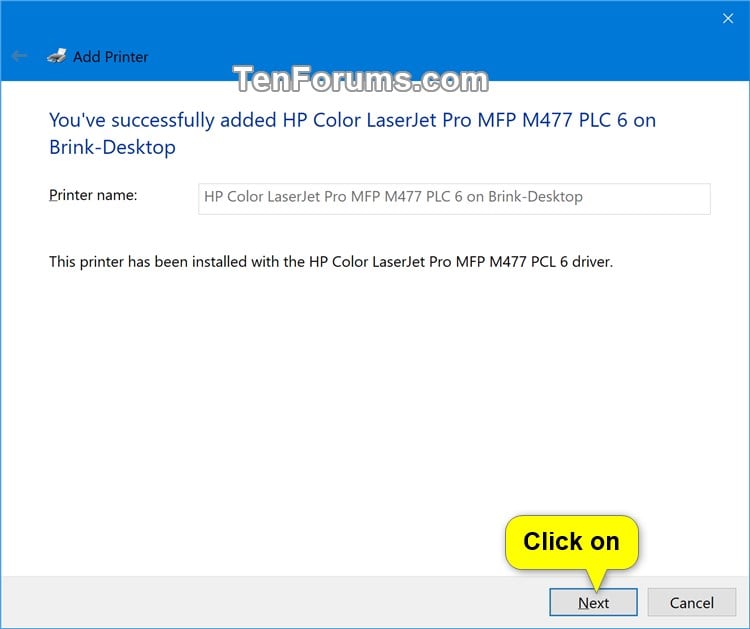
7. If you like, you can Print a test page to check if the shared printer is working properly. Click/tap on Finish when done. (see screenshot below)

8. The shared printer will now be available on your PC. (see screenshot below)
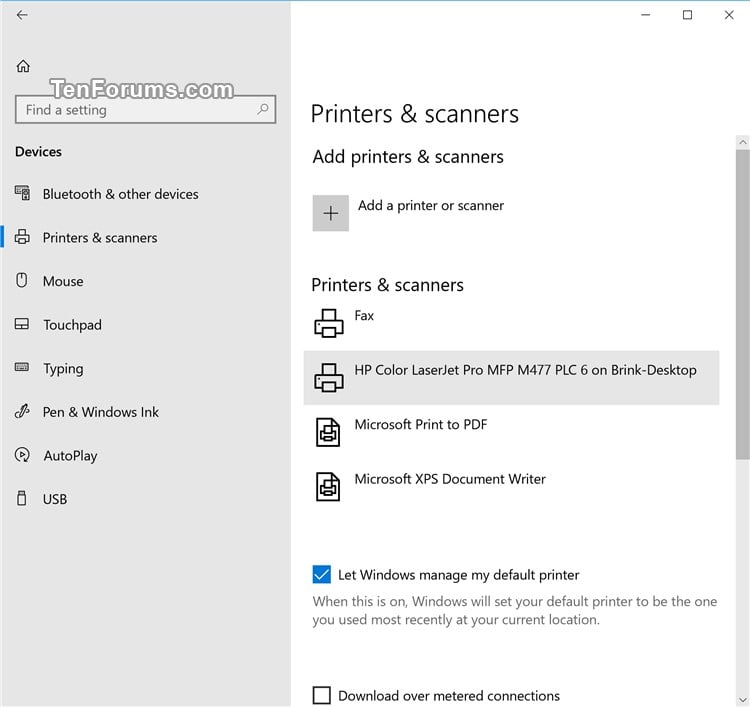
9. You can now close Settings if you like.
1. Open Settings, and click/tap on the Devices icon.
2. Click/tap on Printers & scanners on the left side, and click/tap on Add a printer or scanner on the right side. (see screenshot below)

3. Click/tap on the The printer that I want isn't listed link on the right side when available. (see screenshot below). Please note the method below is if you do now see the Share printer listed. If you do see the printer, please click on it to add the printer.

4. Select (dot) the Select a shared printer by name option, type in network path of the shared printer, and click/tap on Next. (see screenshots below)
For example:
\\Computer name\Share name of shared printer
OR
\\IP Address\Share name of shared printer


5. Your PC will now try to locate the shared printer, then download and install the driver from the computer the shared printer is connected to. (see screenshots below)
 If drivers for your 32-bit or 64-bit Windows 10 is not available from the computer the shared printer is connected to, then you will need to manually find and install the driver for the printer instead.

6. Click/tap on Next if the shared printer has been successfully added. (see screenshot below)

7. If you like, you can Print a test page to check if the shared printer is working properly. Click/tap on Finish when done. (see screenshot below)

8. The shared printer will now be available on your PC. (see screenshot below)

9. You can now close Settings if you like.
Was this article helpful?
That’s Great!
Thank you for your feedback
Sorry! We couldn't be helpful
Thank you for your feedback
Feedback sent
We appreciate your effort and will try to fix the article